

Making the Best of a Bad Situation
By Jacob Sharp
What this isn’t:
In the following text, at no time will I be advocating the use of inferior systems or equipment IF you have a choice in the matter. Using sub par or not to spec technology for potentially life saving roles is asinine, especially when better stuff is available for a negligible price difference. What’s your life worth? Additionally, this is not a rifle review of the AR556. The gun here is irrelevant, to an extent, but in this context it takes on the role of the average hobby grade AR, (albeit a bit of a nicer….ish… one).
What this is:
Unfortunately, not everyone has a choice in the matter… Whether it be due to contract, department policy or mandate, or simply a bad or uninformed initial purchasing decision as a civilian, many people are stuck with budget or hobby grade rifles. While this obviously isn’t an ideal situation, it is a realistic one, and in many cases, (such as patrol rifles), having a crappy rifle is usually greater than not having a rifle at all. Don’t despair though, because while change is the goal, and superior equipment is quite simply, superior, there are in fact ways we can improve the stuff we are stuck with. Furthermore many of these improvements can be carried over onto future upper receivers, thus minimizing the financial burden in the long run. This is a proof of concept.
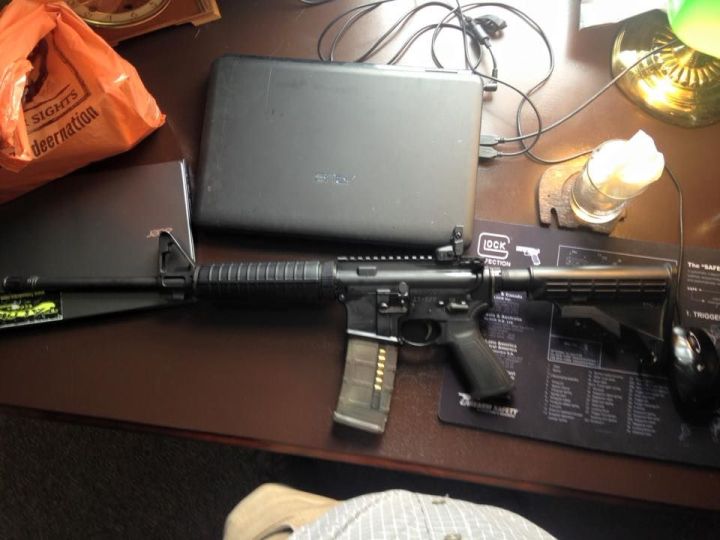
The Gun:
For this experiment, the particular rifle in question is a Ruger AR556. This is Ruger’s direct impingement offering, with a 7 inch carbine length gas system, mil spec buffer tube, and Rugers own, “unique” screw on polymer delta ring, and blocky front sight base with built in QD cup. I obtained this rifle in a trade pre election, and saw the opportunity to improve it as much as possible, and share this experience.
Initial Inspection:
The first thing you need to do as a layman is inspect the weapon you are stuck with. We are looking for any glaring failure points, as well as inadequate assembly. The castle nut was unstaked, which was easily remedied with a hammer and punch. Staking here is important because the castle nut can work itself loose due to use, which would essentially leave you with a loose stock and buffer, potentially mid gunfight. Staking is the act of using a hammer and punch to push metal into the cutout on the castle nut, creating a “block”. This fix could be done on your lap in a patrol car, if it came down to it.

Before, no staking.


After, staked.

Additionally, upon initial inspection, the bolt carrier group, (arguably the heart of the rifle’s operation, when paired with a good barrel), was sub par as well. In addition to not having a sufficiently staked carrier key, the BCG utilized cheap YFS fastener screws, which are significantly weaker than normal fasteners due to thinner head walls, and inferior materials, and Ruger would not disclose whether or not the BCG had gone through any additional testing processes. In fact, after exchanging emails with Ruger, requesting gas port sizes, what, if any lubricant was used for the barrel extension, the torque specs they used for attaching the barrel, and what test processes the BCG had gone through, I received a message stating that my query had been forwarded to the techs, and I would be responded to shortly.
That was about three weeks ago as of the writing of this article….. So for the operator level shooter, without having a workshop or tools to take the gun totally down and inspect, (as you average patrol officer might not be able to), you have no way of knowing what measures went into the creation of this rifle.

Ruger Bolt Carrier Group, notice the poor staking and YFS fasteners.

This was the easiest, and most critical upgrade for this rifle. I simply took advantage of Son’s Of Liberty Gun Works great prices, and grabbed one of their full auto BCGs. They are VERY transparent with their level of quality control, and it shows once you compare the two side by side.

Notice a difference in transparency, even on the box?
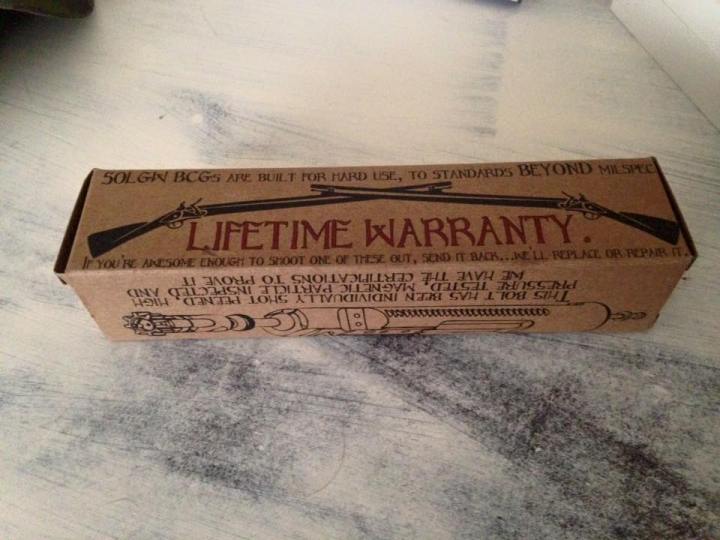

SOLGW Left, Ruger right. Notice the difference?

The final ingredient for success are magazines and quality lube. Quality magazines, whether they be well maintained USGI mags, or Magpul/etc help the system to be as reliable as possible. Magazines are also expendable items, keep this in mind. Do pre combat checks in order to determine whether or not your rifle is properly lubed, set up, and your magazines and ammo are functional. This simple care and preventative maintenance will go a long way towards helping your below spec equipment stand the test of time, (at least in the interim while you obtain better stuff).
Engine First, then paint:
With the costliest and arguably most important internal upgrade out of the way, the shooter can then begin to look towards external, or “cosmetic” upgrades. Note that these changes might not be allowed by many shooters parent companies/agencies, due to contract or policy. A stake job and BCG can be hidden from the casual observer, but a new set of handguards often cannot.
The first and most useful upgrade in this case is furniture, as a means to an end of mounting a white light. While the OEM stock and grip are adequate, the handguards are sub par, and lack even heat shields. I went through two handguard sets during this evaluation. The first was the Magpul MOE SL. These afforded a lengthened reach, (due to their design), and kept the rifle fairly lightweight while adding the ability to easily add a foregrip and light. However, due to the screw on, polymer delta ring that the Ruger has, they were unnecessarily unstable. I ended up using a set of KAC drop in M4 RAS rails, which helped mitigate the wobble factor with their clamp system that goes around the gas tube and into the actual barrel nut. Both of these handguard sets are fairly budget friendly, (considering the KAC’s can be found used all over the net), and help to further optimize the carbine.

The rifle in it’s stock form.

The screw on, polymer delta ring, and the flimsy OEM handguards.


The rifle with Magpul MOE SL handguards, next to my primary BCM gun, demonstrating the length difference in the handguards.

Light is important, considering that nearly half of the day is darkness, and positive identification is crucial when engaging potential targets. On this particular rifle I utilized an older Surefire 6P, with a Viking Tactics light mount. While low in output, the throw is okay, but for my use as a backup gun, it is adequate. As a duty rifle, go with as many lumens as you can afford. Currently the Surefire Fury lights, as well as their Streamlight equivalents, are a very good deal considering the dollar to lumen ratio. Changing handguards allowed us to mount this all important light, and is crucial when setting up a hard use gun.
Also important is the use of a good two point sling. A two point adjustable sling can be found in the $30-$70 range, and allows the weapon to be retained when traversing obstacles, or using both hands for an administrative task, while still allowing for maximum shootability when necessary. For this rifle an older VCAS sling was used. For the front mounting point, I used one of the Blue Force Gear Universal Wire Loops. This component is very useful when dealing with rifles that have inferior, (or non existent), sling loops on either the front or rear of the gun.

The VTAC mount, VCAS sling, and BFG UWL pictured in use.

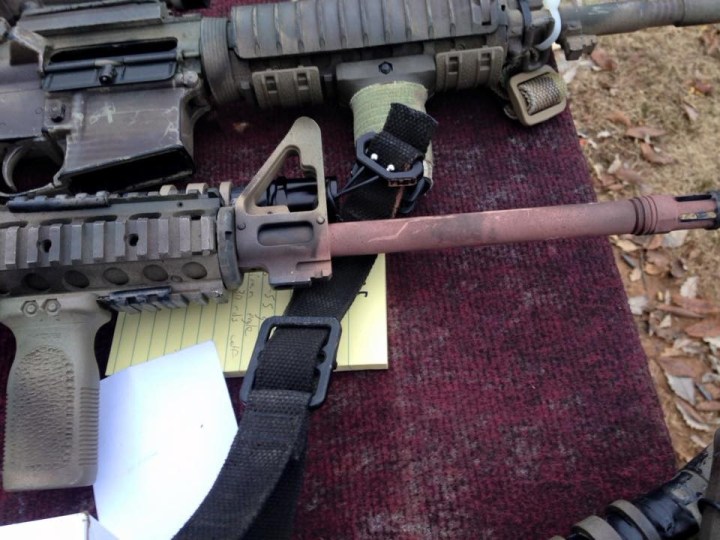
The final cosmetic upgrade is the paint job. This is a tertiary concern for many, but has it’s own set of benefits that have been covered many times before. Keeping the rifle cool, as well as reducing its visual signature with both the naked eye, and on the IR spectrum are important factors that the rattle can job can provide. The paint is cheap, and is easy to change with the seasons, or touch up when needed.

Initial “5 minute” paint job, using Rustoleum camo colors, freehand.

But does it work?
In an attempt to put some sort of legitimacy behind this concept, while maintaining my shoestring ammo budget, I decided that some sort of rapid fire, “hard use” type of drill would be necessary. I set aside 300 rounds of Wolf Gold 55 grain ammo for the testing, in order to give the gun a good shakedown and verify that it was in working order before putting a mag in it and shoving it in the corner.
-50 rounds of Wolf Gold 55 grain were fired for zero, and fam fire.
-180 rounds were expended back to back in a 6 mag “dump”, in order to attempt to break the gun or assess weaknesses.
-Remaining 70 rounds were expended on rifle FAST drills, as well as random firing out to 100 yards on steel.
-50 rounds of American Eagle 55 grain were also fired through the rifle during this range day.
The gun was lubed only when I installed the SOLGW BCG about one month prior to the firing, and wasn’t lubed throughout the duration of the testing. Video of the testing can be seen here:
No malfunctions occurred during this session. While this is not a definitive test, it is at least a positive data point for the gun and the upgrades that we performed.

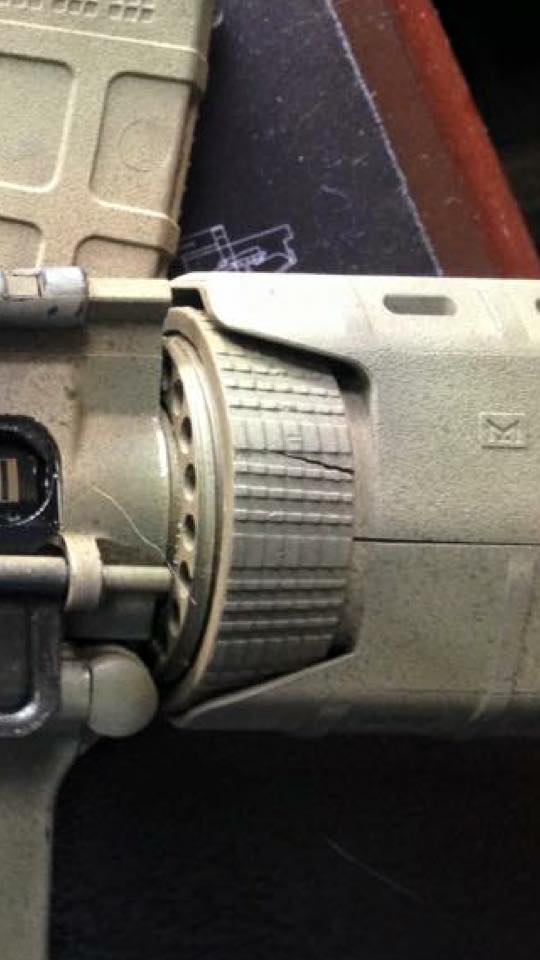
Baked paint post dump.

While this existed when I obtained the gun, (not the fault of the testing), it is still not a positive note for Ruger’s “innovative” delta ring design. Metal works.

The Ruger backup gun alongside my primary BCM rifle.

In conclusion:
Let me reiterate, this is not an endorsement of sub par equipment, and it never will be. However, for those stuck with sub par equipment, you can still do something to bring those guns somewhat up to speed. With a little bit of knowledge and a few smart upgrades, the gun you are forced to use can at least have all the odds stacked in it’s favor, reliability wise.

Excellent read, I will say it seems Ruger answered a lot of those deficiencies in their SR-556. I will have to reexamine my BCG when I get back stateside though.
LikeLiked by 1 person
I hope so. The only thing that would have me concerned is that the SR is their take on a piston gun, so you might not see some of the crossover from this rifle, being a direct impingement system.
I’ve heard good things about the SR rifles though, they seem to be fairly well constructed compared to this model.
LikeLike