

Why Do It?
I’ve been painting my rifles almost as long as I’ve owned rifles. The reasons behind it are varied, and some may not apply to the average civilian shooter, but I’ll briefly list them out, and then we’ll get down to application.
Signature- Both daytime and nighttime/IR signature is reduced by effectively camo painting your long gun. Black is not a color found in nature, and thus, by eliminating it from your rifle, you help break up the unnatural vibe that a big black gun puts off. This is essential when hiding from people, but may not apply to the guy hitting the range.
Heat- Ever leave your gun laying on the bench on a sunny day, and burned your hand picking it up? Guess what DOESN’T happen to a painted gun…..
Finish- By adding a coat of paint, you are essentially adding an extra layer of protection to the guns surface. This will aid in keeping any potential rust issues down, among other things.
CDI Factor- Chicks Dig It.
How to do it….
Many people overthink the process of painting. This is likely what happens when you take a $4 rattle can to a $1200 rifle. In my mind, the benefits far outweigh any potential cons, and furthermore I view my guns as tools. If your gun is a safe queen, that’s fine, keep it that way. My guns get shot and beat around, not out of negligence, but out of use, and so….
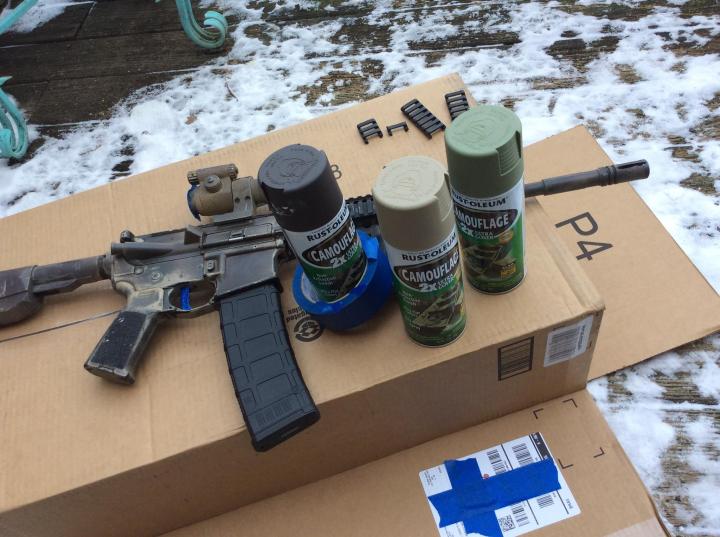
You need:
-gun
-paint (rustoleum, krylon, or aervoe camo colors). I reccommend at least 3 colors, with tan for your base.
-tape, preferably masking tape
-place to paint, preferably well ventilated
-rag or paper towels for messes
Prep-
Take a rag, paper towel, baby wipe or whatever, quickly wipe down the rifle, and dry. The goal here is to simply remove any oil that’s on the surface of the gun. Oil will negatively impact the paint, and won’t allow it to adhere, resulting in a crappy looking paint job. Some people use alcohol pads and all manner of other things, but the paint job will deteriorate over time. The paint will likely scratch the first time you charge the gun, so it’s really not worth my time to spend an entire day prepping.
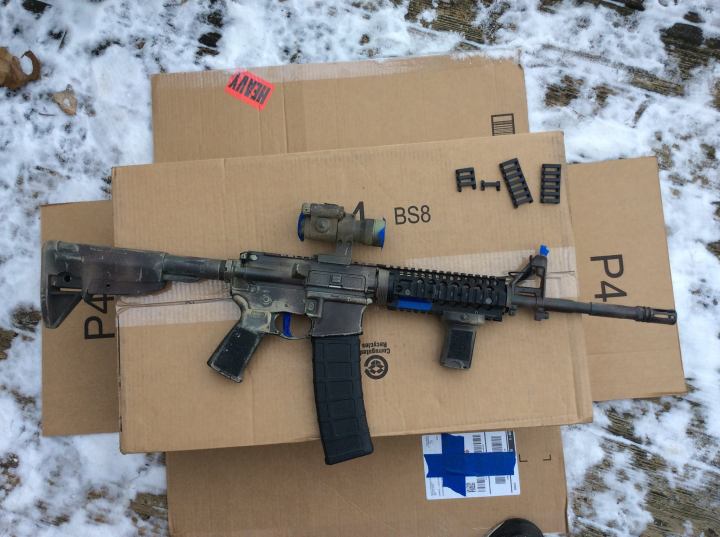
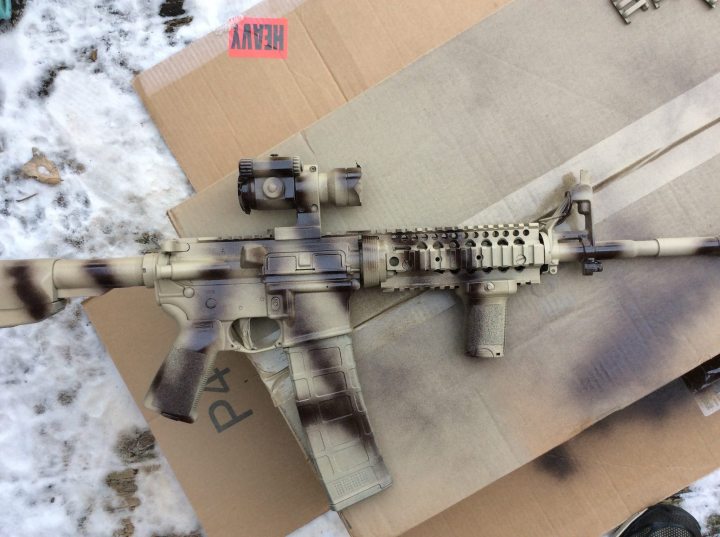
Masking tape is then used to cover optic or flashlight lenses, the front sight post, (optional), and the trigger, (also optional). I fill the mag well with either newspaper/paper towels, or the closest black magazine I can get my hands on. For this gun, I also chose to tape over the Daniel Defense markings on the rail, but that’s vanity stuff, and not essential.
Paint-
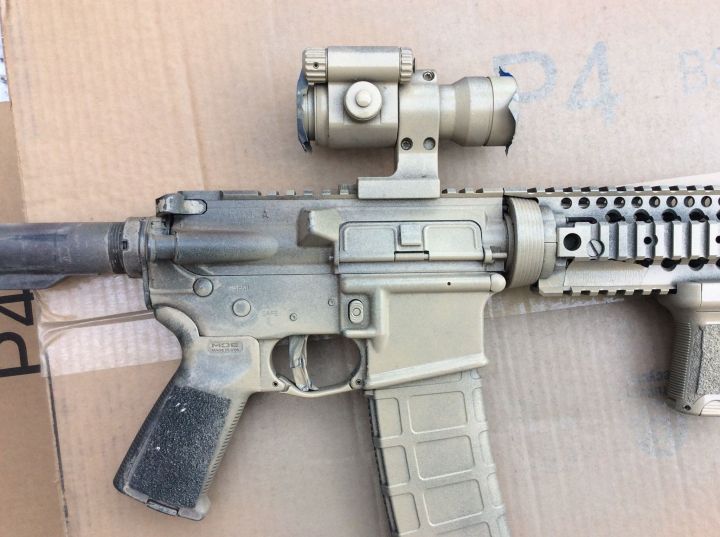
Next up is the actual application of paint. The first coat needs to be the lightest in color, for this I always start with tan. It’s easier to make the gun darker than the opposite, so tan is the answer.
THE KEY is to keep the can about 18-24 inches away from the surface at any given time, additionally, start painting off of the gun, and then work onto the gun. This gives you some leeway in case the nozzle does something erratic. Keep all of your coats thin. Adding too much thickness to parts eventually affects their function, this could be an issue with the safety selector, trigger, mag release, etc…
Mist the paint onto the gun until you get a thorough coat. Keep it thin, take it slow, and check your work.
The below photo shows the process:
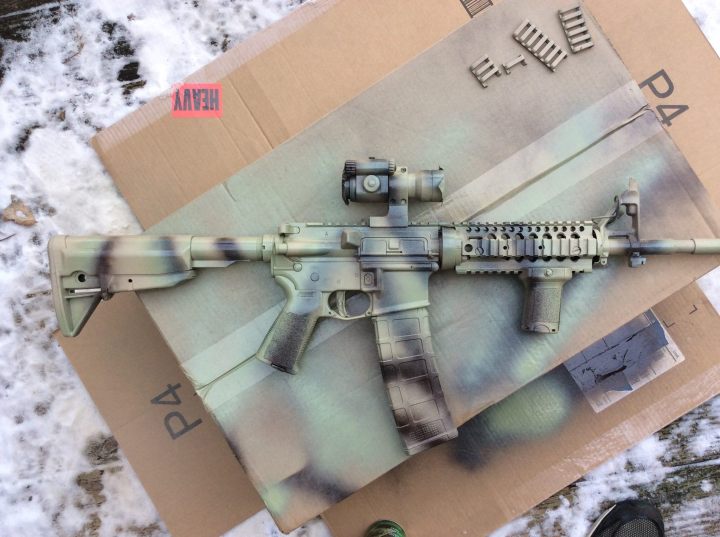
If you keep it up, you will eventually get a solid coat all around:
Once your base coat is complete, you then move onto patterning. There are countless ways to do this, with a variety of materials. Fishnet, laundry bags, camo nets, etc… can all be used to create random patterns. For this gun, however, I simply free-handed on some tiger stripes. Simple and effective.
For this pattern, I always go from the base coat to the darkest color available, in this case brown. Start closer to the surface, off of the intended target, and quickly stripe across in random directions. Keeping the directions the same will attract the eye, whereas a random pattern will aid in further camouflaging it.
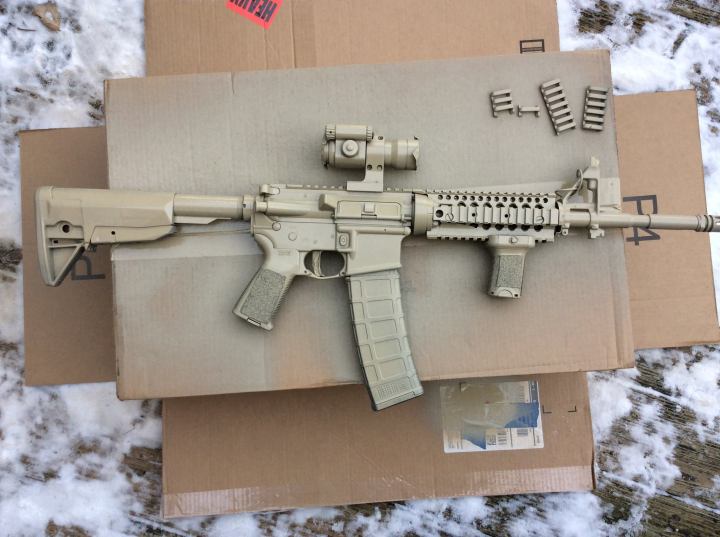
As you can see, if you lived in a desert environment, you could stop here. I’d just take the brown and mist over the gun from about 3 feet away in order to blend the colors, and call it good. In my case, however, I added a third color.
The third color is a light green. Your lighter colors will essentially follow the initial striping, in order to make them a little less harsh.
Do this to all sides. Once this is complete, the final step is to blend to colors. I do this by going back to the darkest color, (brown), and simply misting over the gun from about 3 or so feet away. This pulls everything together and softens up the lines, resulting in a much less harsh pattern.
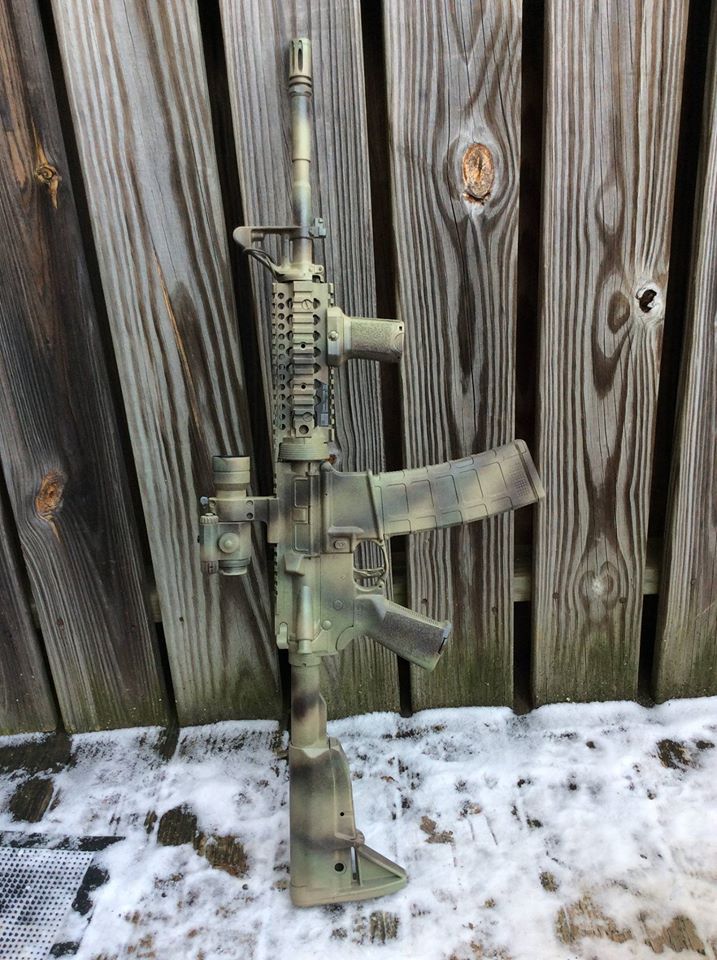
As you can see, the final blending aids in bringing the whole pattern together. The options/color combos/patterns are virtually endless. I highly encourage you guys to paint your stuff if you think it’s right for your situation.


Regards.
