

The entire time I’ve owned multiple AR’s, I’ve always had a designated “primary” system. This rifle is the one that does the bulk of the shooting. This rifle was initially assembled as a trainer for my issued setup, allowing me to get more training reps even outside of work, when I couldn’t run to the arms room and grab my gun for some impromptu familiarization. The gun has changed over the years to reflect it’s new role as a home defense gun, but most of the core components remained the same.
Upper:
We will start with the upper receiver. As the complete upper is the component that has the biggest impact on the overall reliability of the system, I always recommend that if the gun is going to have a “duty” centric purpose, (in this case, home defense), you should stick with quality factory built options. Factory assembly from quality manufacturers means that proper specifications were followed, and knowledgeable armorers did the work. For this reason, I went with Bravo Company. Bravo Company, (BCM for short), has a proven track record of producing reliable AR components.
Since the gun’s initial purpose was to replicate my issued rifle, that’s exactly what I did. I went with BCM’s M4A1/SOCOM upper, with carbine length gas system, fixed FSB, and 14.5 inch barrel with a pinned/welded A2X flash hider in order to bring the gun up to the legally required minimum of 16 inches.
In the below image, you can see my issued rifle on the left, and my personal gun on the right. Though there are some minor differences, and though my personal rifle, (sadly), lacks a PEQ 15, the overall function and form were nearly identical, allowing me to “get those reps” even when on my own time, thus increasing my weapons handling ability.


The rail currently holding the gun together is a Daniel Defense 7 inch Omega. Unfortunately, free float options for carbine length fixed FSB style guns are extremely limited, due to the increased popularity of more modern options. The Daniel Defense option was graciously given to me by a fellow Herd paratrooper. In addition to free floating the barrel, it also provides a continuous length of rail that bridges over to the upper receiver, giving you the ability to put your optic even further forward, if you so choose. This rail in particular is a drop in option, and is extremely easy to install.
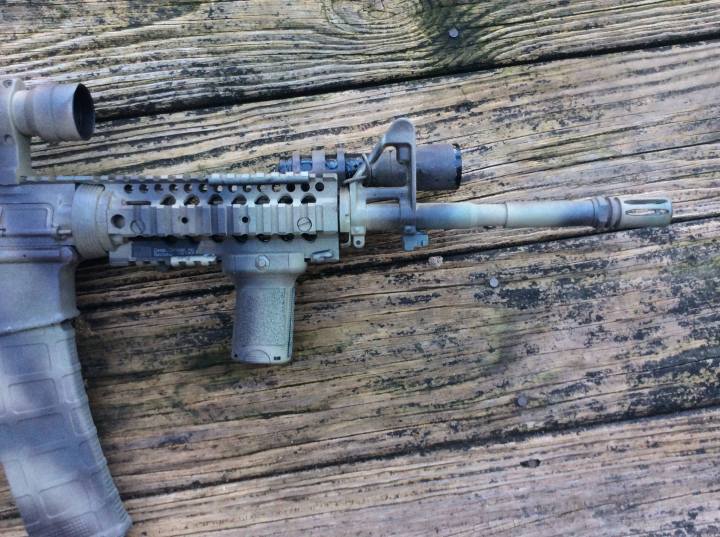
Attached to the bottom of the rail is a BCM vertical foregrip. Due to the short nature of carbine length handguards, having a foregrip allows you to more effectively control the weapon, and also puts my hand in the optimal place for activating the weapon light. I’ve added some grip tape to both the foregrip and pistol grip for added, well, grip.
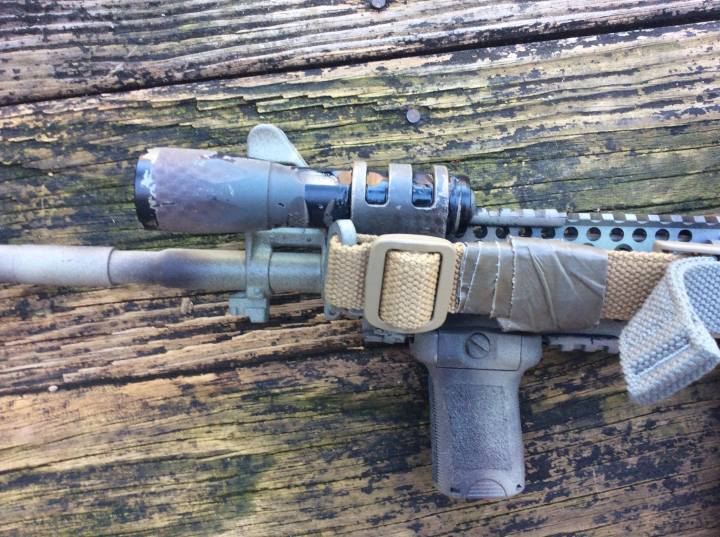
On the other side of the gun we have the weapon light. Arguably one of the most important components of a civilian rifle, a high lumen weapon mounted light allows you to search for targets in the dimly lit confines of your house, and positively identify those targets. This light in particular is a Surefire P2X Fury in a Viking Tactics Mount, clocking in at around 500 lumens using two CR123 lithium batteries. At the time of purchase, the Fury was one of the highest output lights on the market, but at this point it is rivaled by it’s big brother, (the P3X, at around 1000), and a couple of Streamlight options in the same ranges. Having the most amount of light possible is critical, as it gives you much needed information when you are involved in a shoot/no shoot scenario.
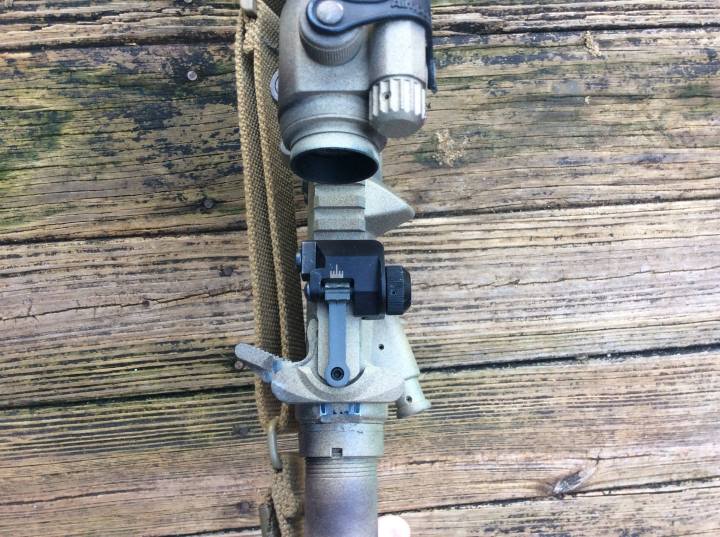
For sights, I’ve got two methods. The primary optic is an Aimpoint PRO in a Larue lever mount. This gives me a 2 MOA aiming dot, with about 30,000 hours of run time, (yes, run time). The long run time let’s me leave the optic on setting 7, all day every day. If I need the gun NOW, I also need the optic to be on, and Aimpoint lets me do that.


Since I already have the fixed front post, it only makes sense to me to have a backup sighting system for the off chance that I need the gun and the battery is somehow dead. While you can effectively use the body of the PRO and the front sight post as a large “ghost ring” at close range, I also keep a rear flip up mounted at all times. It’s a KAC low profile sight that I came into when I was in the Army, I’m honestly not sure what the exact model is. Good thing about it is that it sits so low that it’s always out of my way, to the point that I legitimately forget that it’s there. With modern technology, many argue that a rear BUIS, (back up iron sight), is unnecessary, but given it’s extremely low weight, I’m not sure I understand that argument. It doesn’t do anything to hold me back, and can only help in a tough situation.
The last sighting “mod” I’ve done is to simply paint the front sight post white. This took about 5 minutes, as mentioned in another article, and helps me easily acquire the sights should I be forced to use them.
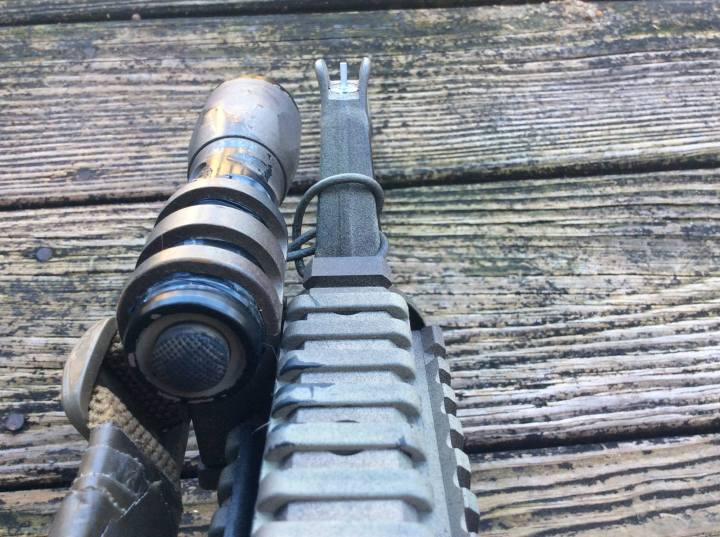
Inside of the upper, and not pictured, is the BCM Bolt Carrier Group, and the above pictured BCM Gunfighter Charging Handle. The extended latch of the Gunfighter simply allows easier activation during weapons manipulation, and was well worth the relatively small investment.
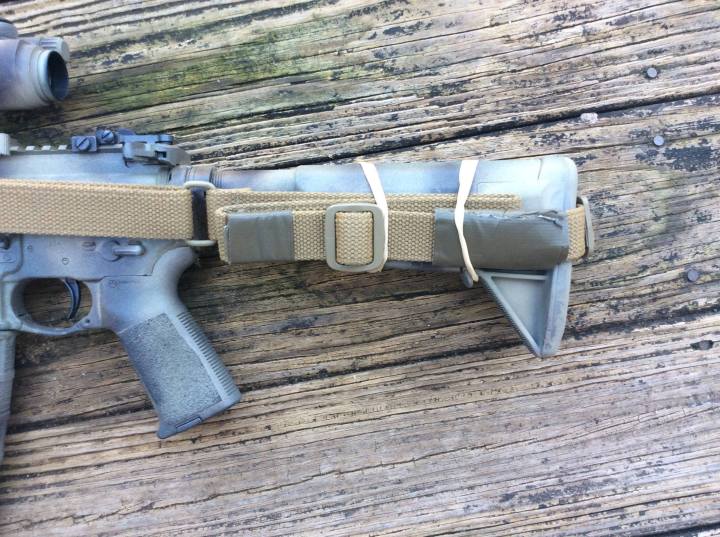
The pictured sling is a Vickers Combat Applications Sling, which is a two point adjustable. Two point adjustable slings allow for maximum weapons retention when not using the gun, and allows you to easily add or remove length when dealing with gear or various shooting or traveling positions. There are many good slings out there, this is simply the one I prefer. The sling is mounted to the front sight base using a Blue Force Gear EWL, (albeit negating some of the free float capabilities, should you apply much pressure while shooting), and to the BCM stock with a basic QD mount.

Moving on to the lower receiver, I chose a BCM blemished lower, which allowed me to get the same great BCM quality at a lower priced point. I never found the blemish…..
Inside the lower I have a Geissele SSA trigger. The SSA brings the total weight down to around 4.5 lbs, with the first stage being 2.5 lbs, and the final stage and “break” being 2 lbs. This gives me a very nice and smooth trigger, with the same reliability as the original component. Be careful not to go too low with your pull weight on a standard, “non precision” gun.
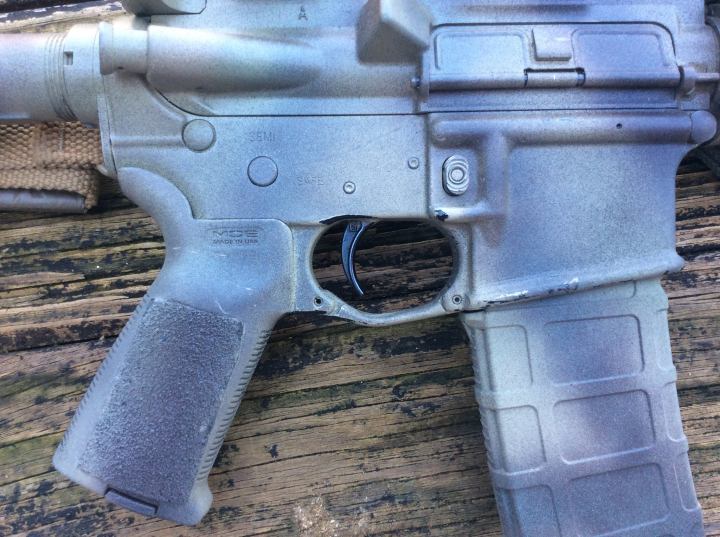
I’ve also added a Magpul MOE pistol grip, and trigger guard, simply because I prefer them to the original components. Pistol grips and trigger guards are nearly entirely personal preference.
Finally, on the back of the gun I’ve got a BCM Gunfighter stock. You might be seeing a pattern here. The Gunfighter stock is extremely simple, light weight, and locks up to the buffer tube very tightly. It offers QD points for sling attachment, and also has a “shelf” which locks rubber bands into place should you choose to keep your sling banded, like I do. Banding the sling simply prevents it from becoming tangled on everything when you are using it in vehicles or other confined, snag zones. All you have to do to employ the sling is rip it away from the gun, which will snap the bands. It’s a pretty cool trick that I’ve been using on both of my rifles since I learned of it.
Summary:
All in all, I’ve been very happy with the rifle. The upper has performed reliably over the course of around 4000 rounds so far, and the lower has nearly 15,000 on it. Whatever you choose to use as your primary rifle, spare no expense, and don’t sacrifice reliability or performance for form and ‘gram points.
Regards.
